Timing pages
I will try to explain in this section, how to customize the timing pages to your needs. All the settings are in JRT Config > Page options.
You select the timing tab of your choice. Then you have the options you can change for the timing page selected.
To test the settings and understand easier what each setting does, I would suggest you to open iRacing in a practice session or a spectator session
and then open a JRT timing page. When you change a setting in JRT Config and click the apply button, you will see almost immediatly the changes.
I. About the columns width
Before trying to change the values, it's important to understand how column width are calculated. It will probably seem complicated at the first look, but once you understand how it works, it's better to set the column width accurately no matter your screen width is.
There's two calculations modes:
the responsive mode and the non responsive mode.
- The responsive mode is used if you want all elements to resize proportionnally to the screen width.
- The non responsive mode won't use the screen size for reference and the size of the columns will be exactly the number of pixels set
in the width value for each column.
a. Non responsive mode
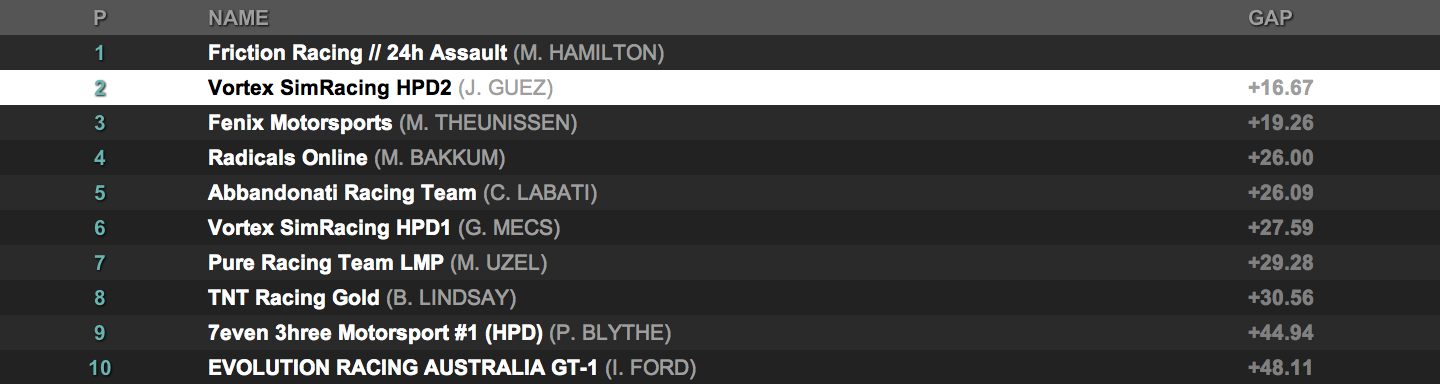
On a 1440 pixels screen width, if I choose the settings below:
Responsive Mode : unchecked

Relative line height : 70

'pos' width : 200

'name' width : 1040

'name' option : 6:Team and Short Driver Name

'gap' width : 200
I will have this:
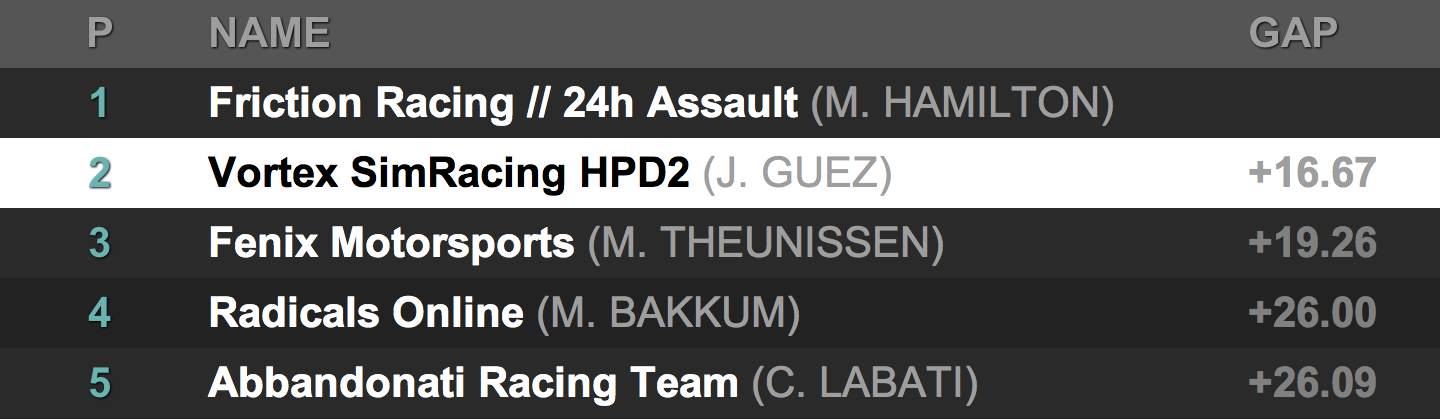
Note that I set 200, 1040 and 200 for the widths because 200 + 1040 + 200 = 1440. If I had set 100, 600 and 100 I would have this:
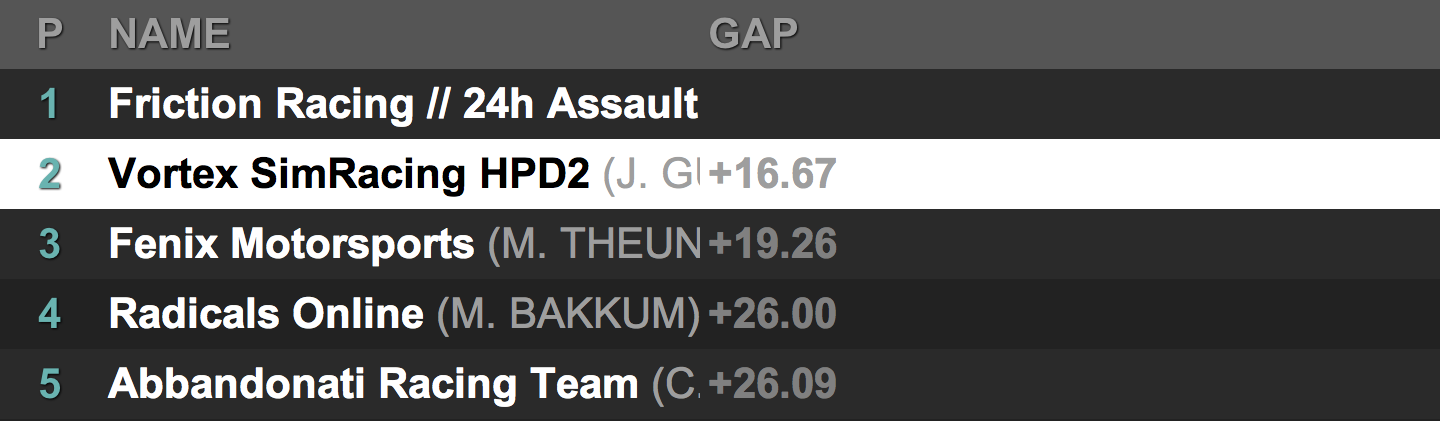
As 100 + 600 + 100 = 800, it leaves a 640 pixels margin.
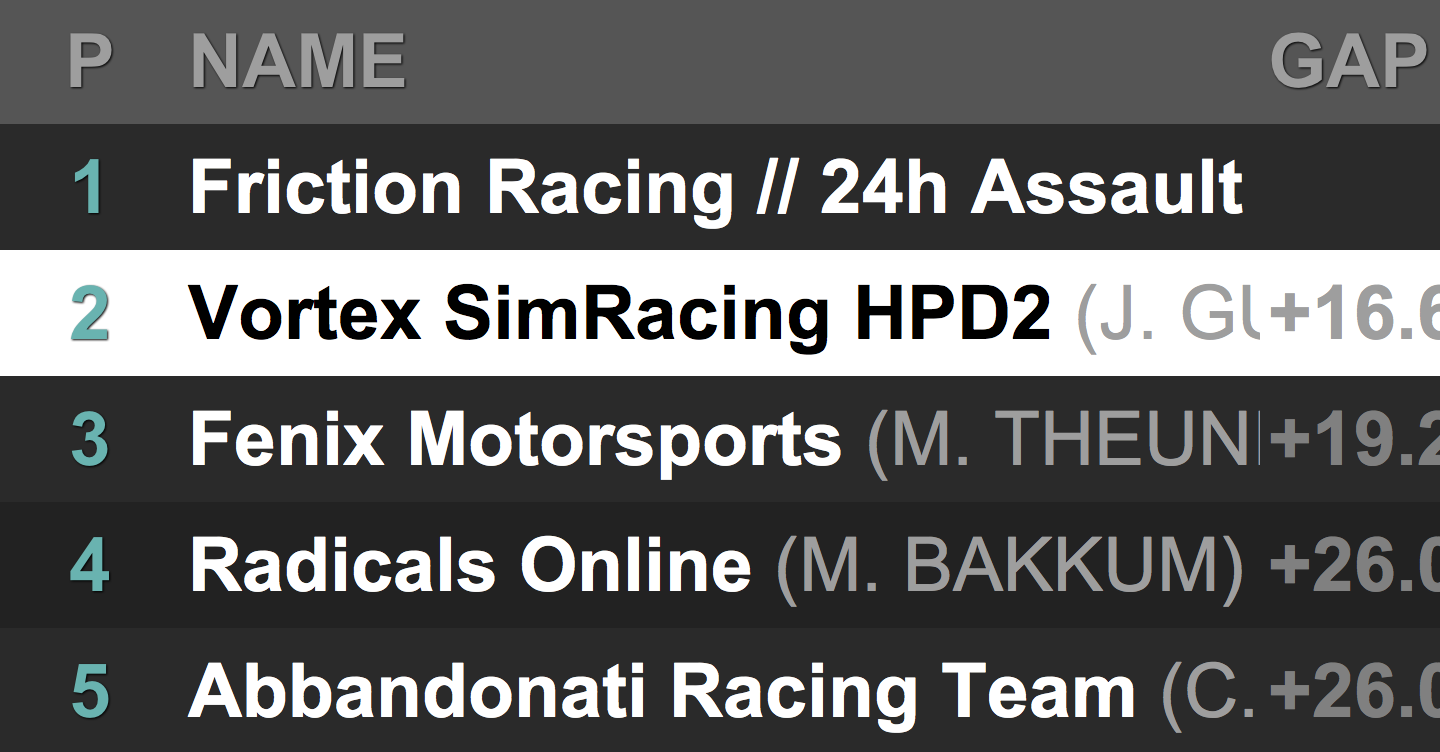
But on a 800 pixels screen width, there won't have margin:
b. Responsive mode
Still on a 1440 pixels screen, look at what we have with these settings:
Width reference : 1440

Responsive Mode : checked

Absolute line height : 70

'pos' width : 200

'name' width : 1040

'name' option : 6:Team and Short Driver Name

'gap' width : 200
I defined the variable "reference_w" that is important here in responsive mode. I choose 1440 for better control of the columns width::
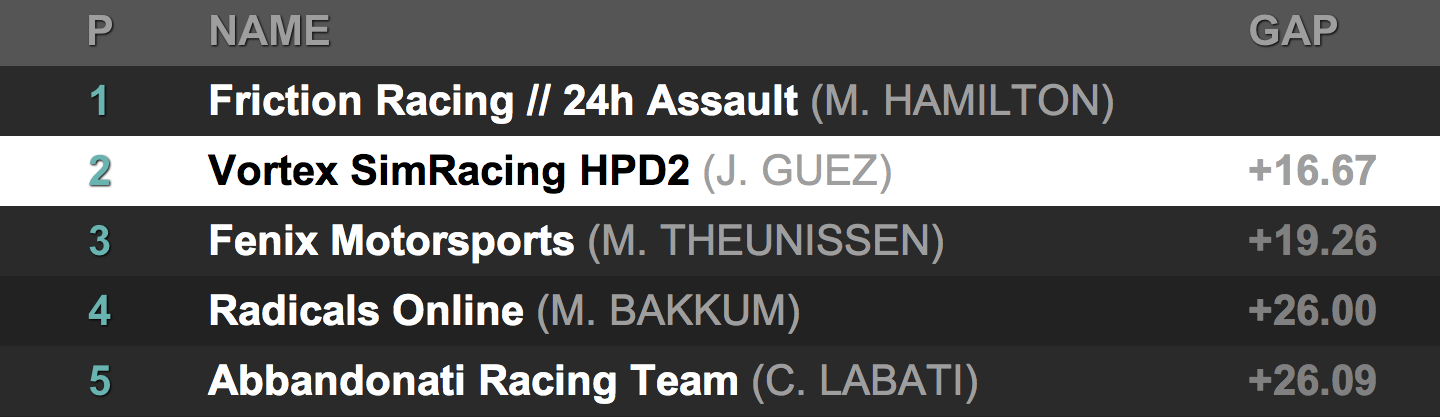
We have the same result than in the first example in non responsive mode.
Now, let's look at what we have on a 800 pixels screen with the same settings:
The advantage of the responsive mode is to display the table on any screen in the same way.
c. Change columns height
The columns height is defined by the variable "ligne_h". In non responsive mode, the value will be the lines height in pixels. In responsive mode, it will be proportional to screen width.
In bith cases, if you want to divide the line height by 2, you will also divide by 2 the value.
Width reference : 1440

Responsive Mode : checked

Absolute line height : 35

'pos' width : 200

'name' width : 1040

'name' option : 6:Team and Short Driver Name

'gap' width : 200
Then we have space to add more columns:
II. Columns descriptive
In JRT Config > Pages Options > timing tab, you have on the left the columns list you can display on the timing page. Here is a descriptive for each column :
- line_num:
Line number. It is useful if you want to see the positions when you sort the columns by iRating, Best laptime, ...
- pos:
Position.
- cpos:
Position in class.
- spos:
Start position.
- scpos:
Start position in class.
- predicted_pos:
Predicted overall position at the end of the race.
- predicted_cpos:
Predicted class position at the end of the race.
- gain:
Spots gained or lost since the start. On replays, this number is correct only if the replay is launched from the start of the race.
- cgain:
Spots gained or lost in class since the start.
- num:
Car number.
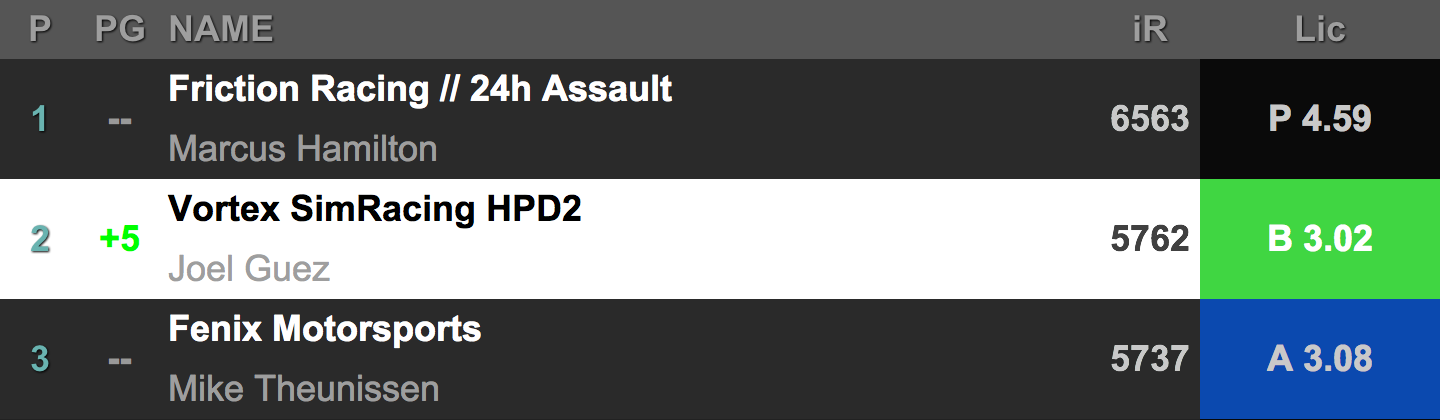
- name, ir and lic:
Driver Name/Team, iRating and Licence. The name color is orange when the car is in the pit lane and red if the driver did a tow.
You have some options for these. Here are some example depending on the option set :
'name' option : 1: Full Driver Name

'ir' option : 1: Normal display

'lic' option : 1: Compact

'name' option : 2: Short Driver Name

'ir' option : 2: Display with license color

'lic' option : 2: Full

'name' option : 3: Very Short Driver Name

'ir' option : 1: Normal display

'lic' option : 3: iRacing style Compact

'name' option : 4: Team Name

'ir' option : 1: Normal display

'lic' option : 4: iRacing style Full

'name' option : 5: Team and Driver Names

'ir' option : 1: Normal display

'lic' option : 1: COmpact
'name' option : 6: Team and Short Driver Names

'ir' option : 1: Normal display

'lic' option : 1: Compact

- clubname:
Driver club name. There is two modes. Mode 1 displays the club name and mode 2 displays the club logo.
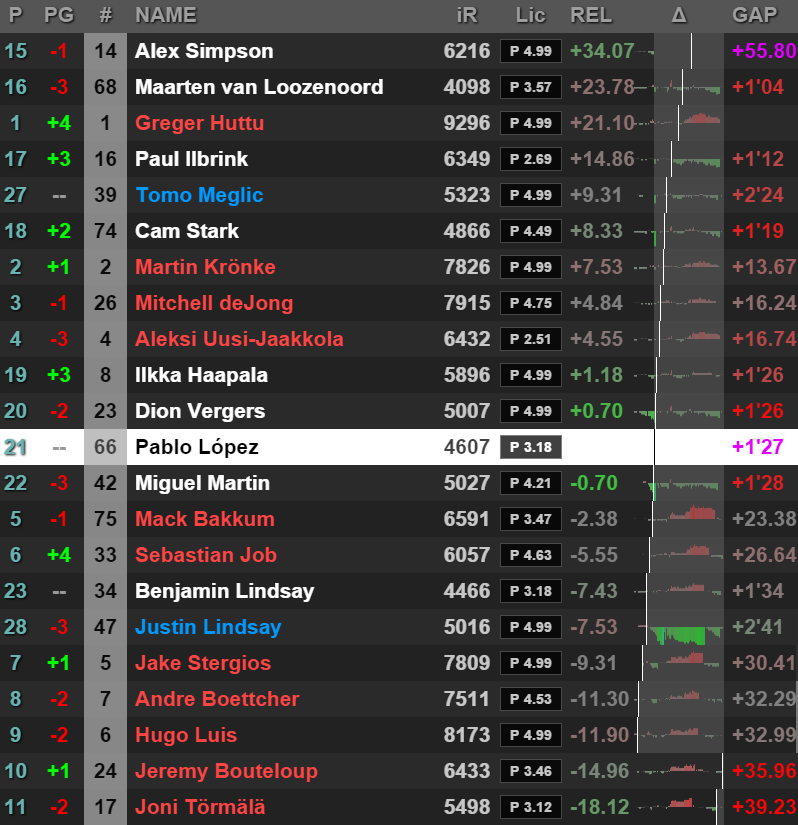
- rel:
Relative gap in real-time between the driver and the selected driver with white background. It displays the gap in time and not in laps. In endurance races with big gaps, the gap is somehow delayed.
For example, it's 11h18, the leader completed is 100th lap and the selected driver completed his 90th lap. Suppose that the leader completed 90th lap at 11h00, then the gap displayed will be 18 minutes. If the leader gives up at the end of lap 101, the gap won't decrease until the selected driver completes the lap 101.
A color code is used to bring out the gap changes (see the delta).
- delta:
Colored graphic that shows the gap changes in real-time with the selected driver.
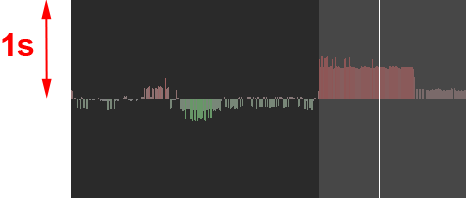
Here is the colors scale:

You can see if you gain or loose time on your competitors with a glance. The graphic delta is active only with cars in the same class to avoid pollution with graphics all red or all green.
The delta is calculated on the last lap of each driver unlike to the relative gap. It is possible for the graphic to be green and the gap to be red, it's not contradictory because the gap wasn't evaluate at the same time.
A white bar gives the driver location on the track. The delta is resetted each lap. The old delta graphic is greyed a little.
- gap:
Absolute gap in real-time with the leader. The same color code is used.
- cgap
Gap in real-time with the class leader.
- last and best:
Last and Best laptime if there was no pit stop. When you read a replay, if JRT was started when the race was live, the laptimes were saved and should be correct, otherwise it is an estimation.
- lc:
Laps completed.
- speed:
Estimated speed. This estimation is correct most of the time on replays but can be less accurate in live depending upon the bandwitch quality, specially when there are a lot of cars on the track.
- accel:
Estimated acceleration in G.
- topspeed:
Estimated top speed.
- apex_speed:
Estimated minimum speed at the last turn.
- max_speed:
Estimated maximum speed before the last braking zone.
- stint:
Laps completed since the last pitstop.
- pit:
Number of pitstops.
- pitroadtime:
Total time spent in the pitlane. When the driver is in the pit lane, tje background is orange and red if the driver did a tow. The background of the other drivers goes green if your pit road time was at least 5 seconds faster and it goes red if your pit road time was 5 seconds slower.
- pitstalltime:
Total time spent in the pitstall. The background is orange when the car is in the pit stall and red if the driver did a tow.
- inc:
Incident number for your car and an off-track estimation number for the others. As for the speed, this number is correct on replays but can be totally wrong in live depending upon your connection and the server quality.
- distpct:
Overall distance in laps. For example, 12.5 means we did 12 laps and a half.
- car:
Default iRacing Car name or logo.
You have also the possibility to use this column to display a customized driver/team logo
or or customized driver/team text.
To use a personal logo for a driver, in the img folder,
put the logo named driver_xxxxx.png where xxxxx is the Driver ID of the driver, and in JRT Config, select 'Customised driver logo'
for the 'car' column. You can set a default logo for the drivers that doesn't have a logo by adding an image named driver_default_[carname].png where
[carname] is the name of the car.
You can do the same but for the team. Put the logo named team_xxxxx.png where xxxxx is the Team ID, and in JRT Config, select
'Customised team logo'. You can set a default logo for the teams that doesn't have a logo by adding an image named team_default_[carname].png where
[carname] is the name of the car.
When you first start the JRT server, 2 txt files are created in the "img" folder in the JRT server root folder. These files are named drivers.txt and teams.txt
This allows you to display the text you want relative to the driver or the team. You can use that to display a sponsor or the team name of the driver.
For example, if you want to display the text 'Geko' for the driver with the ID n° 32830 you will add this line in the drivers.txt file :
driver_[32830] = "Geko";
- qualy
Qualy times when available.
- points
Estimated iRacing championship points.
- avg1, 2, 3
Average of the last / best X consecutives laps.
- sectors
Sectors. It is just an estimation and can be inaccurate sometimes.
- p2p
Push-to-pass count for the Indycar.
- tire_compound
It display the tire compound (hard, medium, soft) for the cars that can use different compounds like the F1 car.
- tires_stints
It displays the number of laps done on the tires and the compound used. It tries to detect if the tires has been changed for the drivers or not depending of the time spent in the pits.
- tires_nb_changes
It displays an estimated number of the tire changes in the session. The estimation is based on the time spent in the pit stall so if a driver does some repairs and doesn't change any tire, the value will be wrong.
- empty
It is an empty column.
III. Timing features and general options
1. Sort columns
In practice and qualifying, the table is automatically sorted by best laptimes, whereas in race, the table is sorted by positions. It's possible to sort by another field when you click on the title.
You can add a parameter to the page adress to sort automatically the standing by the column you want when the page is loaded. You have to add ?sort=qualy for example if you want to sort the timing with the qualy times. Then, you will enter this adress : http://127.0.0.1:8000/timing.html?sort=qualy
2. Units
The speed unit used is the same used in iRacing. It will be km/h if the units set is "Metric" and mph if it's "English".
3. Lines background colors
When you open the timing page, the background color for selected driver in iRacing is white. When the 'Selected Driver Mode' is set to 1 (Selected by the user), by double-clicking on a driver, it change his background color to white and the relative gap is recalculated relatively to him.
When a driver is stopped, his line is darker and if he is disconnected for more then 30 seconds, the line is even darker.
When a driver gains positions, the background goes green, and if he looses positions it goes red. These animations will be deactivated if you uncheck 'animations'.
When a driver is in the pitlane, the text color goes orange. And it goes red when the driver did a tow.
When the race is over, the background becomes grey for the drivers that passed the finish line and the gaps are frozen to keep the final standing.
4. Red options menu
If you click somewhere on the right, a red menu will be displayed. The changes you do here will be temporary. You have the same options in JRT Config.
a. Autoscroll
When this option is checked, the driver selected will be always visible.
Note that in JRT Config you have two modes to decide if you want to display the selected driver at the bottom or in the center.
b. Tires buttons
When this options is checked, the red and blue buttons for the tires are displayed.
c. F3 box
The "F3 box" mode is the same than the one in iRacing. Note that the selected driver in white is automatically the driver selected in iRacing when you are spectating, or yourself if you are driving.
e. Windows options
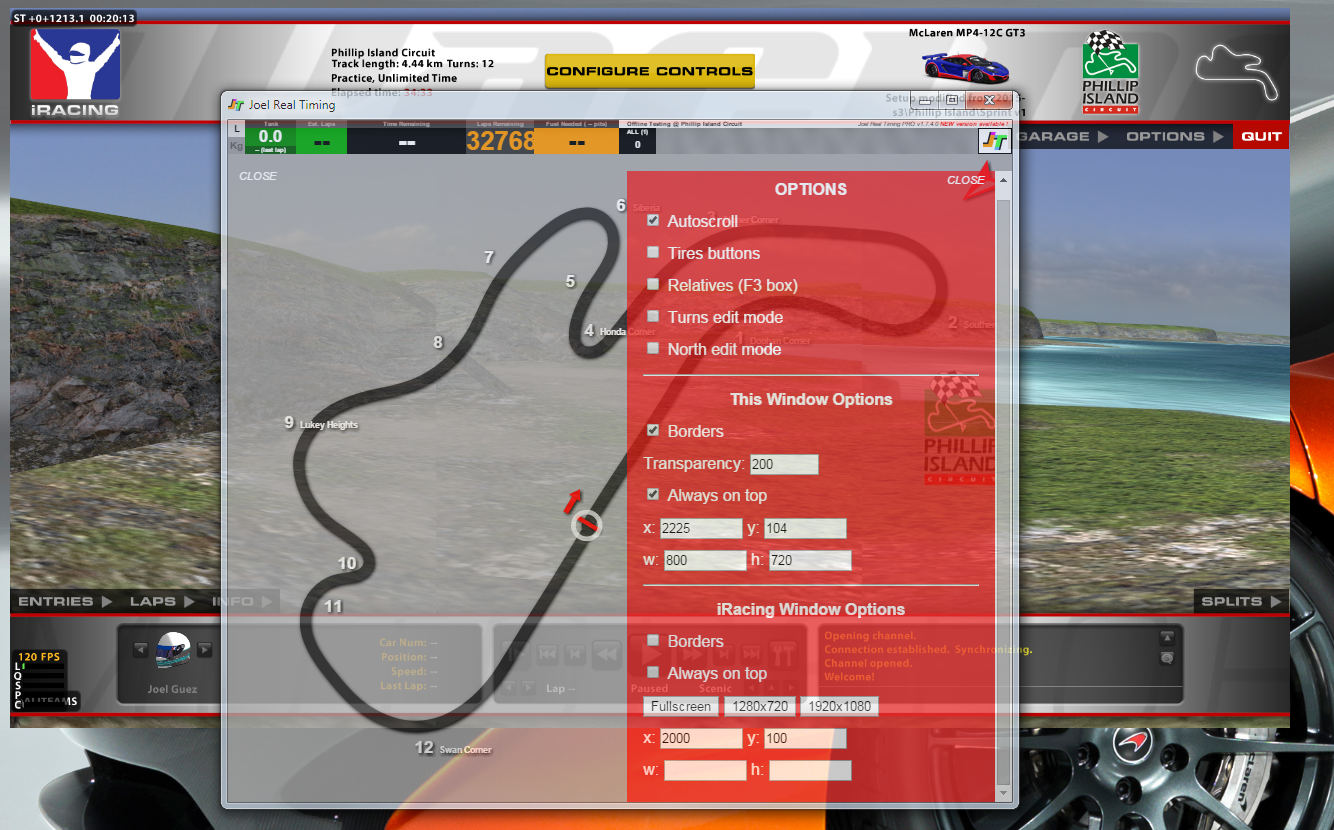
The window options concerns the Timing page or the Trackmap page if you opened it via a
Google application shortcut.
The iRacing window options concerns the iRacing window if you started iRacing in window mode. Moreover, if iRacing is set to
window mode, you can display the Timing and/or the Trackmap over it.
You can set the parameters in JRT Config, in the "Overlay Window Options" area.
These parameters will be load each time you open the page or when the page is refreshed.
The values can be change temporary in the red menu options (to open it, click somewhere at the right side of the page), but as soon as the page will be refreshed they will be resetted.
The value -1 means that the window parameter is not changed.
5. Show the standing by class
There is 2 ways to filter the standing by class :
- Click on the SOF value of a class and it will display the standing by the class.
- Add ?classid=1 in the timing page address to display the first class, ... and add ?classid=-1 to display only your own class.
For example, use this address to display only the 2nd class : http://127.0.0.1:8000/timing.html?classid=2
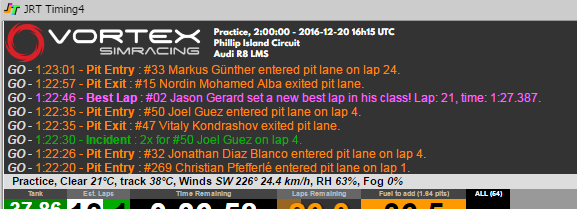
6. Flags
At the upper right of the table, left to the JRT logo, the grey zone changes its color when there is a green, yellow, blue or white flag.
7. Events and replay control
When some events happens during your session, they are registered on the hard drive in C:/My Documents/Joel Real Timing/sessions_data.
There is different type of events:
- Flags
- New best lap
- New leader
- Overtake
- Driver swap
- Pit Entry/Exit
- My incidents
- 3-wides
- Custom (defined when you press a button that you can set in JRT Config)
- Laptimes
When an event happens, it is added in the events ticker on the timing pages. The events ticker has to be activated in JRT Config to be shown. Ahead each event, you have a "GO" button that allows you to rewind the replay a few seconds before the event.
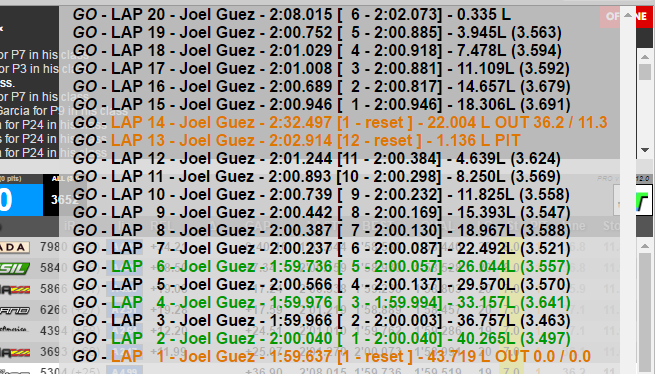
A laptimes history can be shown for each driver with a right click on the driver line or a double-click. You have also the pit stop times and the average laptimes for the valid laps. And the fuel consumption and fuel tank are also displayed for your car. There is a "GO" link if you want to see the lap replay.
You can filter the events displayed in the ticker in JRT Config or in the Events filter menu.
You can see here an example of all the events created while a full race : Events Example
8. Banner with a personnal logo
As you can see on the previous image above the events ticker, you can display a banner at the top of the timing page that contains a logo on the left and some basic session infos as the race length, the track and the car.
There is a banner height setting in JRT Config and a relative path setting.
To use your own logo, add your logo file in the "My Documents/Joel Real Timing/skins" folder. Then, specify the path starting by skins/. For example, if your logo name is
mylogo.png, you have to enter skins/mylogo.png in the path setting. If your logo is in a folder inside the skins folder, enter this : skins/myfolder/mylogo.png.
9. Bottom Menu bar
By default, you have a menu bar at the bottom of the timing pages. You can hide or show it by clicking on the left side of the timing.

This menu gives you access to several features :
- Standing Filter : you can display only some cars on the timing.
- Events Filter : you can decide which type of events you want to display in the events ticker.
- My Results : it displays your results history and you can load the timing page for each sessions registered. It works only when iRacing is closed.
- Trackmap : it dispays the trackmap.
- Colorize Drivers : you can colorize some drivers and/or teams with a specific color. It is saved in the _colorize.js file in "MY Documents/Joel Real Timing".
10. Select the focused car
In JRT Config, you have an option named "Focus on click delay (ms)". When you click on a driver and hold the mouse button for the specified time, the camera in iRacing will focus on the driver. Set the delay to 0 if you want to just have to click on the driver.
11. Star ahead a driver name
For the fuel calculations, JRT calculates first which car is supposed to win according to the drivers pace and the numbers of laps since the last pit, what I call the 'virtual winner'. A start ahead of a driver means that it's the virtual winner calculated by JRT.
12. Start/Finish line
The double yellow horizontal line indicates where is the start/finish line.